


The Decksmith

Mascot Rooftop Transformation — Trex Transcend Composite Decking

A rooftop rental in Mascot, a tired timber structure sitting directly over the tenant’s living room, and a landlord who needed a deck that would stop costing money. I rebuilt the whole space in Trex Transcend composite — the decking I recommend for every rental property I touch — and finished it with an EzGlaze pergola spanning 7.2 metres and a solid privacy screen blocking the neighbour’s pool view. Manually hauling 7.2m EzGlaze sheets up to a rooftop is a physical struggle most builders avoid; it’s the kind of high-stakes logistics I specialize in.

This page tells the story of the build and explains why Trex Transcend is the decking I trust on rental properties across Sydney.

Trex Transcend is my first choice for rentals because its bulletproof capping eliminates the 18-month timber oiling cycle that landlords find impossible to maintain.

FeatureSpecification
MaterialTrex Transcend (Gravel Path)
CappingHigh-performance three-sided shell — built for rental wear
Sub-structureH3 treated pine, sealed cuts and joist protection throughout
PergolaEzGlaze polycarbonate roof, 7.2m clear spans
BalustradeWhite handrails with stainless steel cables
PrivacyIntegrated solid screen wall blocking neighbour pool sightline
LocationMascot — rooftop installation over occupied living room

Trex Transcend is my first pick for rentals. The capping is nearly bulletproof, which matters when tenants and turnover are part of the equation.

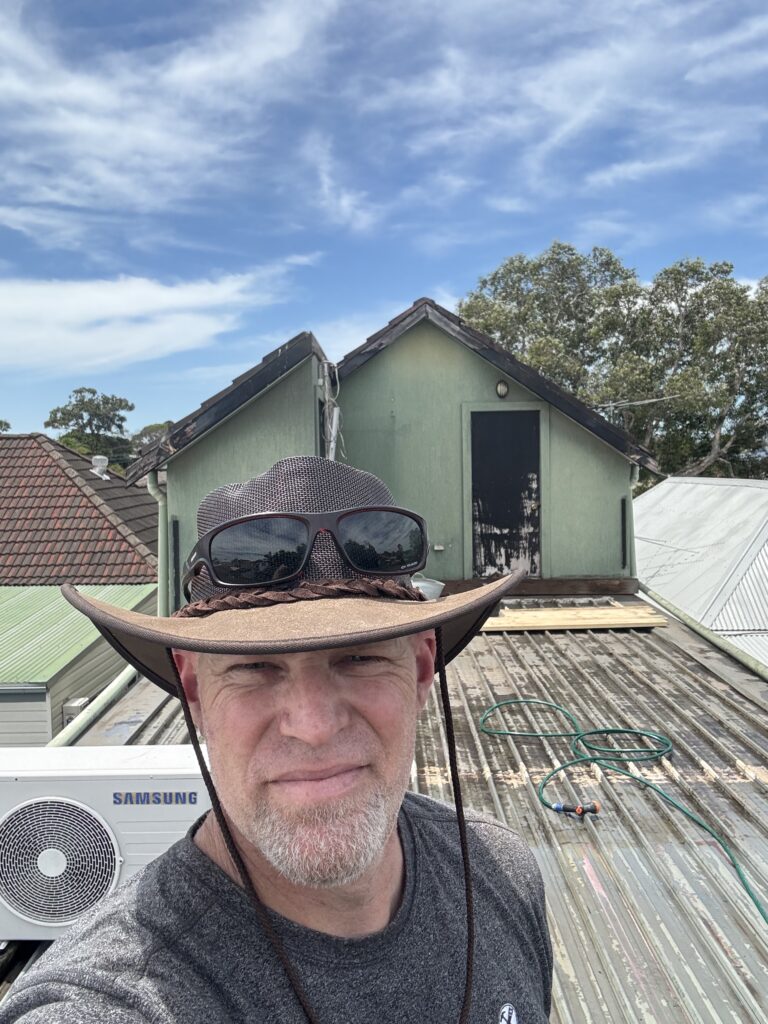
Mascot was a rooftop build. Every piece of timber, every 7.2-metre roof sheet, every bundle of Trex — all of it hauled up by hand. I hit 37 degrees on that Colorbond roof one day and I left some skin on it when I went down on a knee.

What the landlord ends up with is a maintenance-free asset. No oiling every eighteen months. No splinters. No call-outs from a tenant about a rotted board. That is the whole point.

— Greg, The Decksmith

What the landlord was dealing with

The existing deck was old timber, fixed directly to the rooftop above a tenanted living room. Boards lifting, frame compromised, no fall protection on the perimeter I would sign my name to. For a rental, that combination is an unsafe timber liability sitting one Saturday accident away from a serious claim.

The brief was simple. Strip it back to the colorbond, prove the waterproofing held, rebuild it as a low-maintenance asset, and add a roof and screen so the tenant actually used the space.

Stage 1: Before

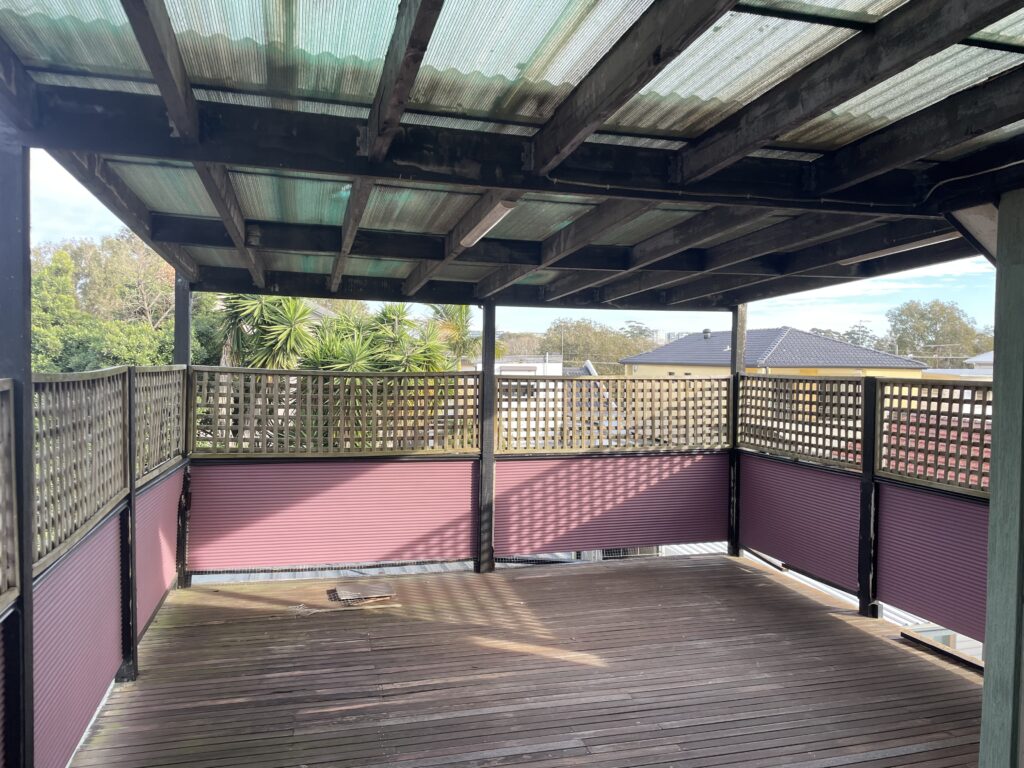
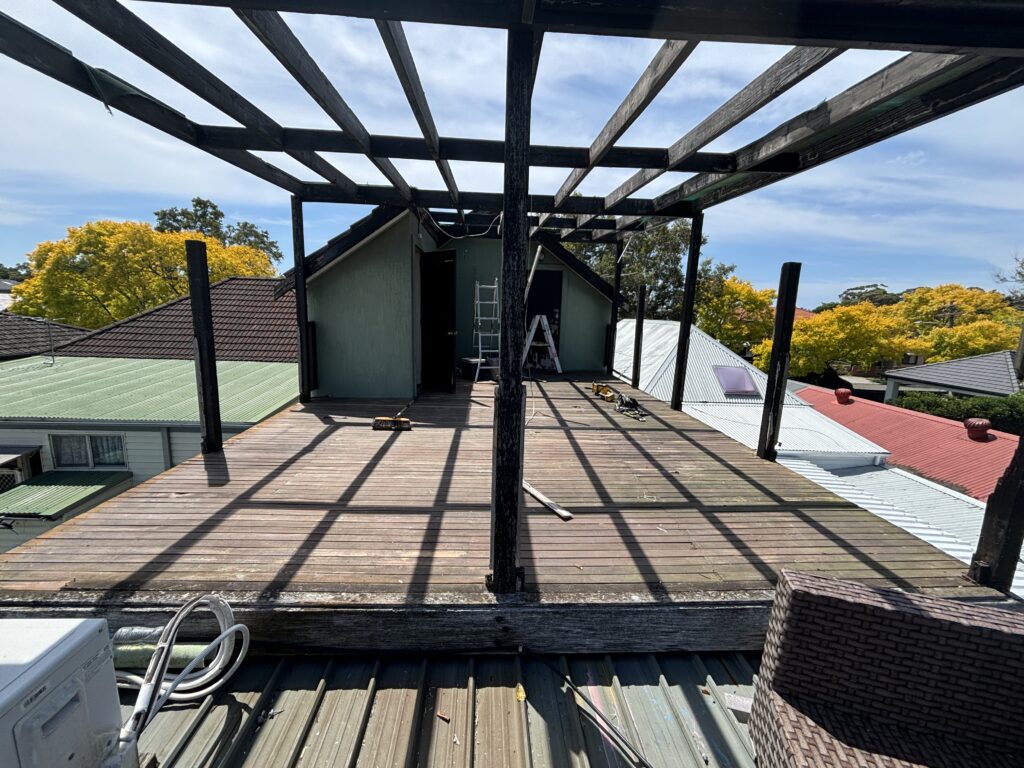
Old timber rooftop deck before demolition, Mascot rental property
The rooftop on arrival. Tired timber deck, old pergola overhead, surface running directly over the living room below.
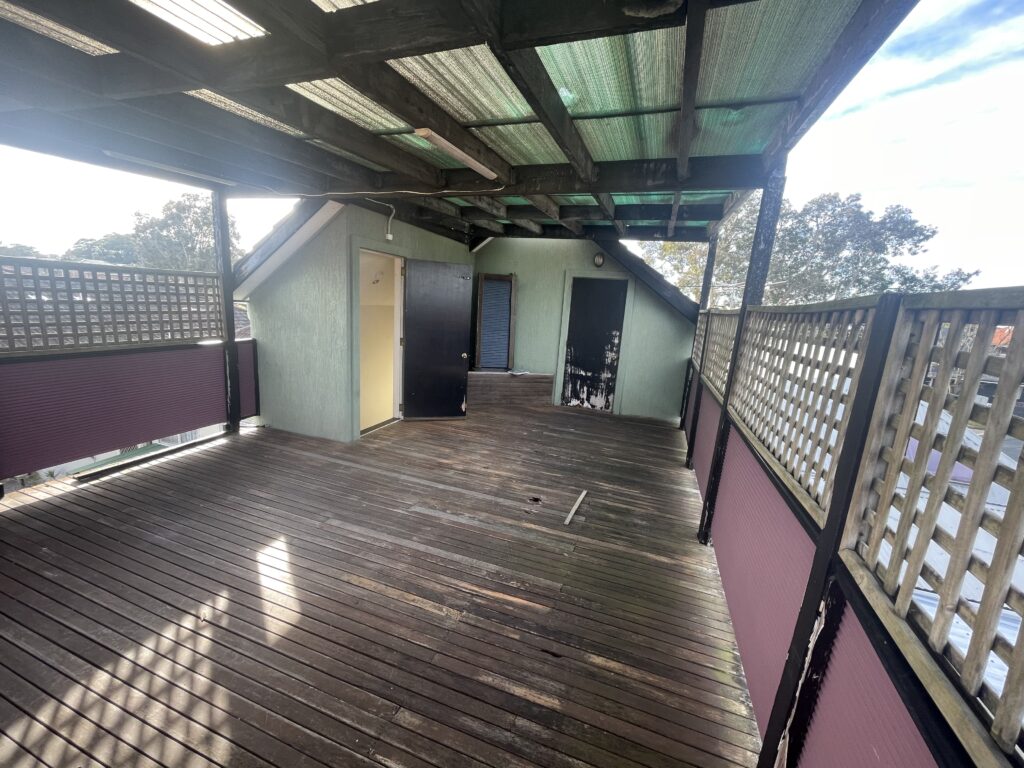
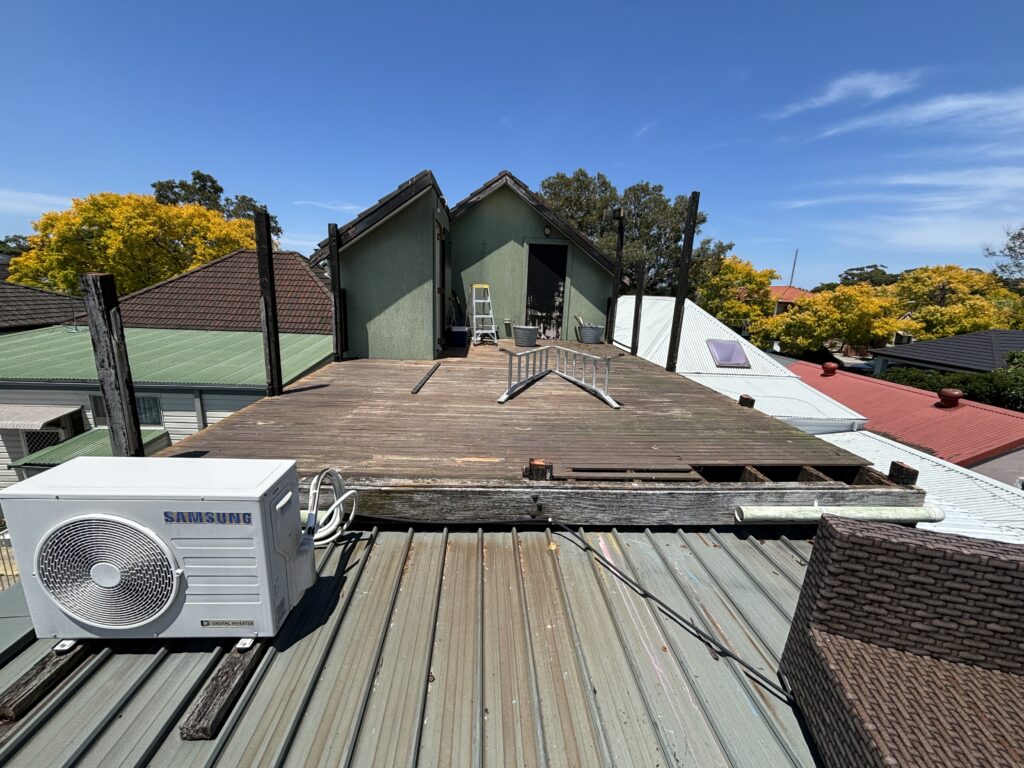
Existing rooftop deck and pergola before rebuild, Mascot
Another angle on the existing setup before I touched it. Worth documenting properly — these shots become the landlord's record of what was actually replaced.
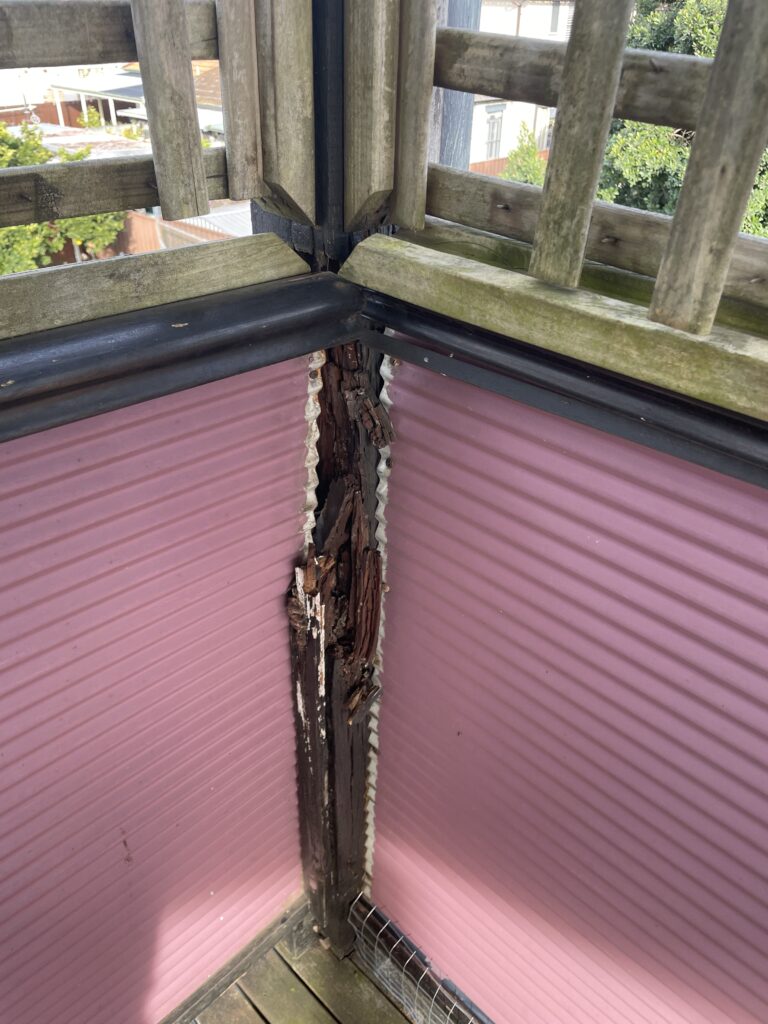
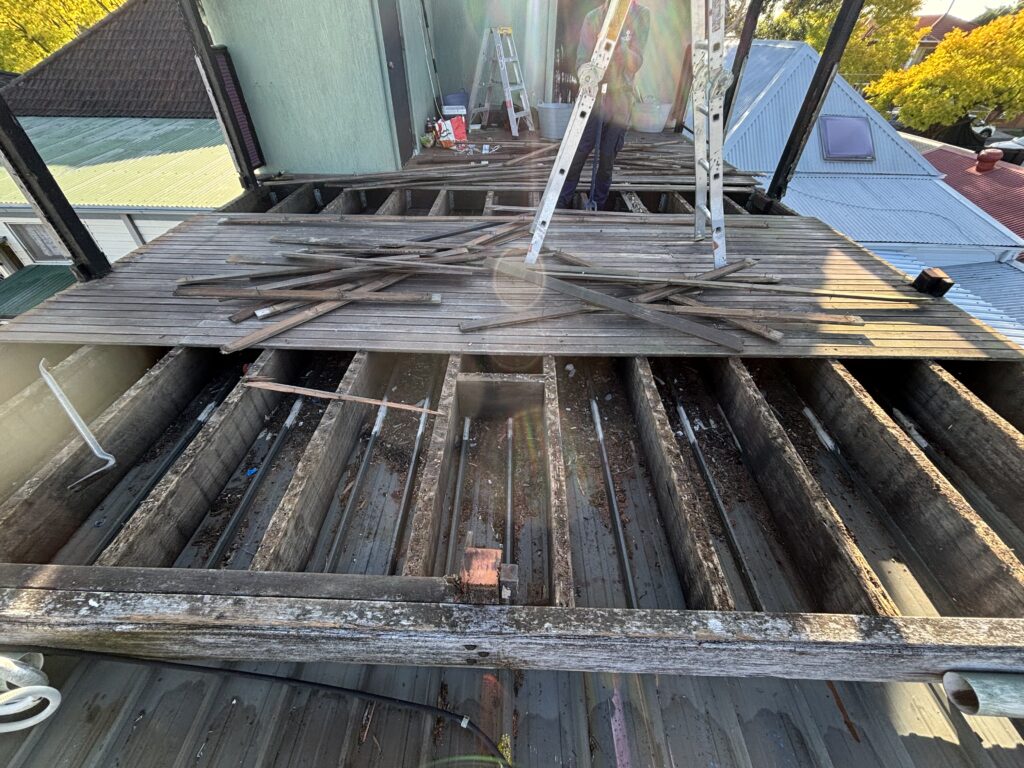
Structural timber condition revealed under old rooftop deck in Mascot
Pulled a board to check the bones. The structural timber underneath told its own story — this was never going to be patched.

Stage 2: Strip it back

Demolition on a rooftop is its own job. Nothing comes down with a machine, every off-cut leaves by hand, and the slab below has to be protected the whole way.

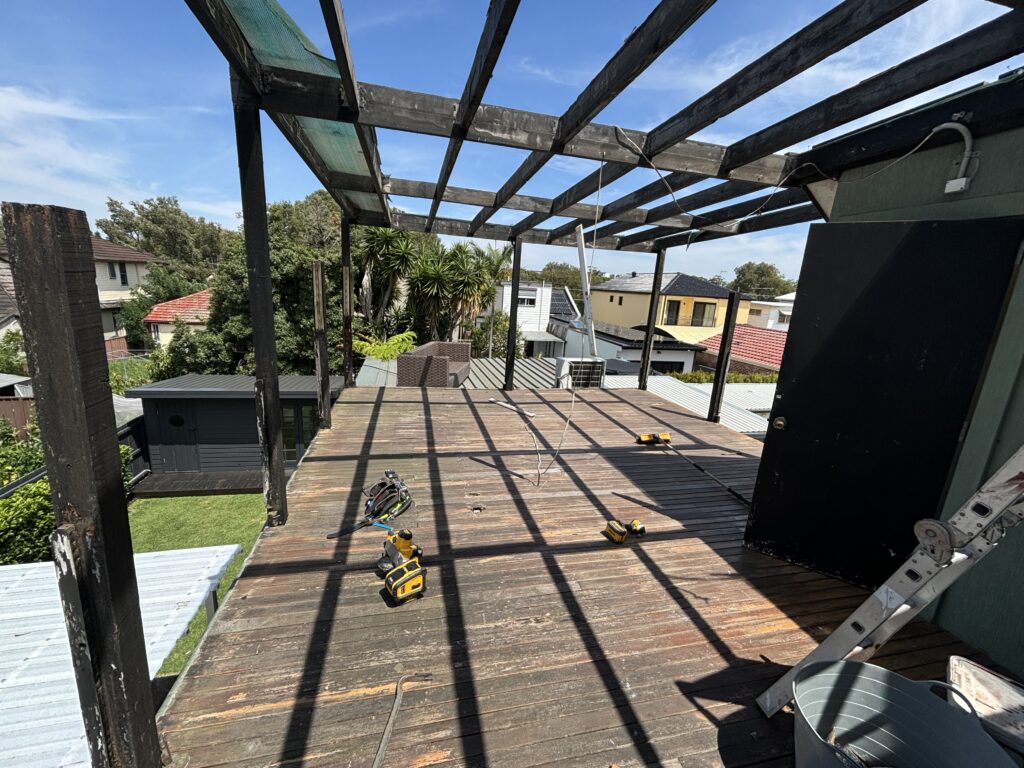
Pergola roof sheets being removed from Mascot rooftop
Pergola roof sheets come off first. Lighter loads, controlled descent, gets the work area opened up.
Old pergola frame demolition on Mascot rooftop
Pergola frame next. Posts and beams unbolted in sections, lowered, stacked for removal.
Deck boards lifted during demolition, Mascot rooftop
Boards start coming up. From here it is rhythm work — lift, lever, bundle, lower.
Shade tarp rigged on hot Colorbond rooftop during Mascot demolition
Rigged a tarp halfway through. There is no shade on a Colorbond rooftop in summer — you make your own or you do not last the day.
Cleared rooftop slab ready for new deck frame, Mascot
Colorbond clean, hosed, flood tested and ready for the new frame.

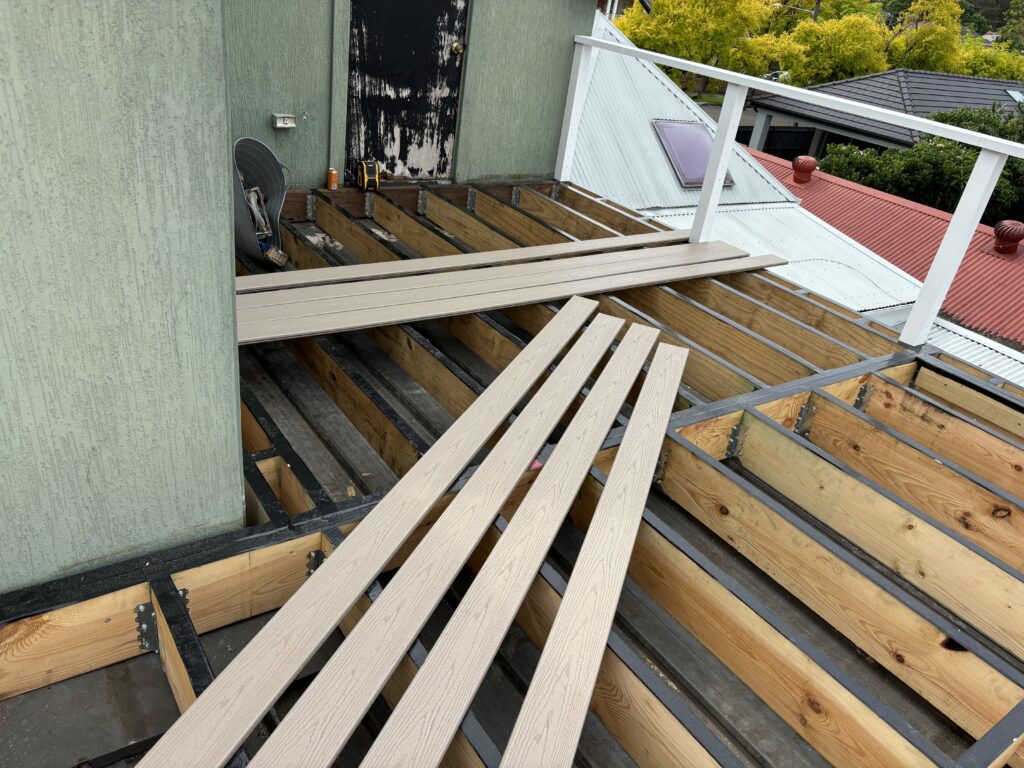
Stage 3: H3 framing on the rooftop

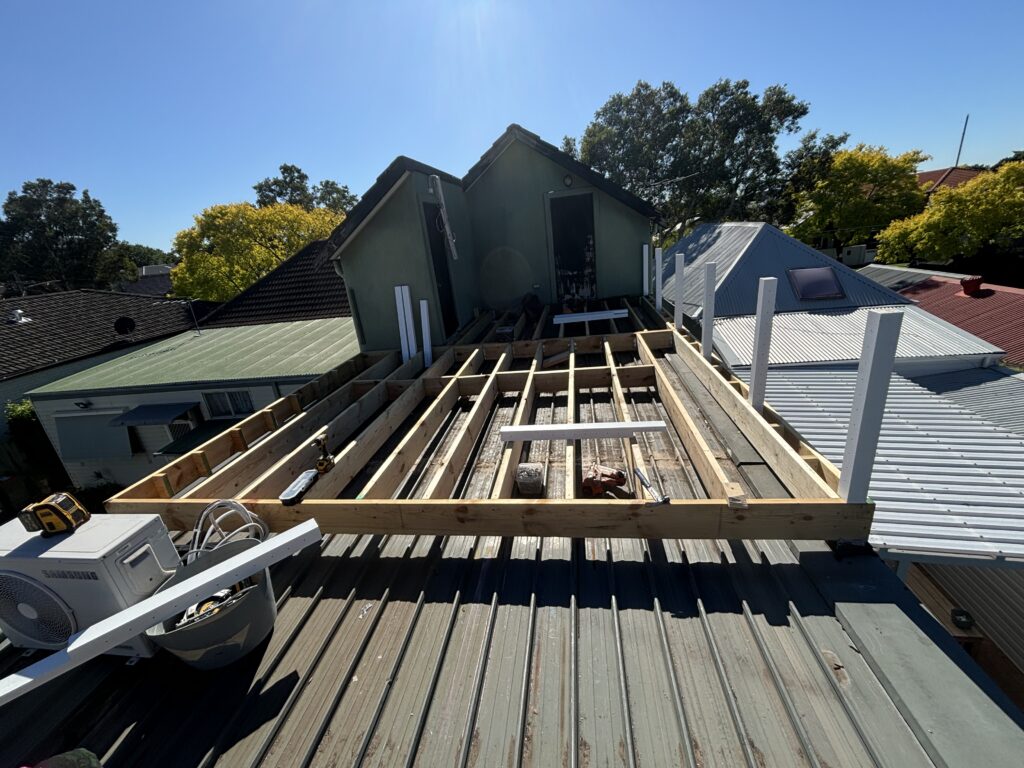
I use H3 treated pine for this build, no water pooling on the roof below and plenty of height and ventilation. Every cut sealed, joist tape over every bearer and joist, packers where the slab needs them.

H3 treated pine deck framing begins on Mascot rooftop
First bearers down. Set to waterproofed anchors.
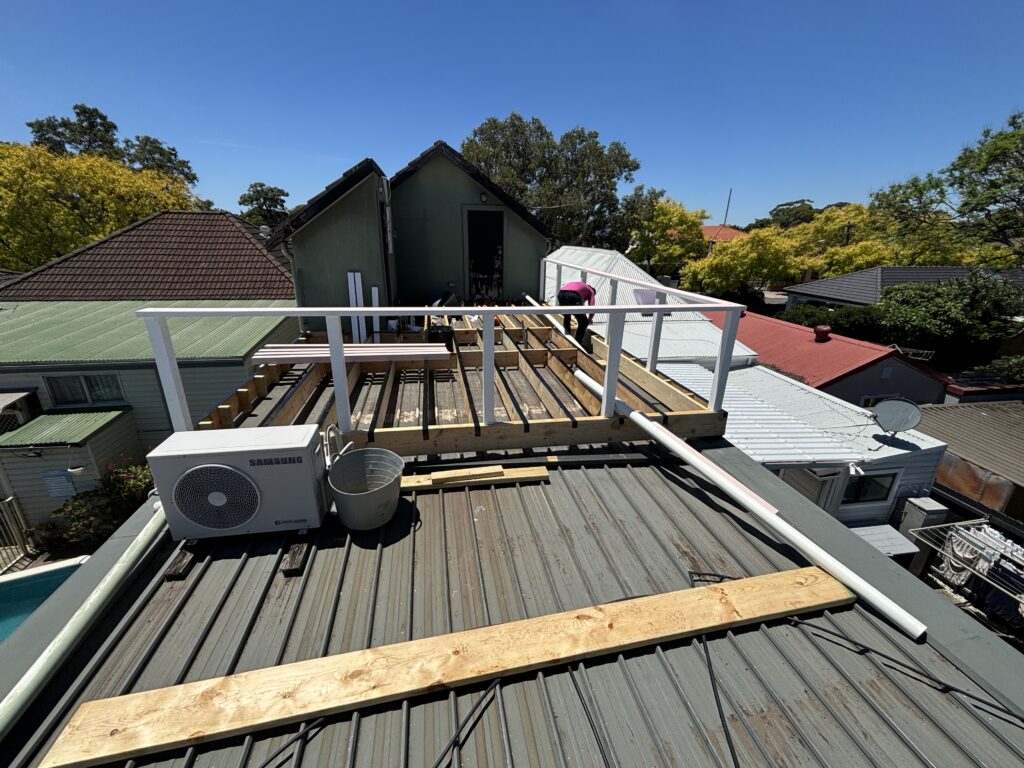
Balustrade posts installed in deck frame, Mascot rooftop
Balustrade posts tied into the frame early. Fixing them in before the joists locks the perimeter in plane.
37 degree day framing on Colorbond rooftop, Mascot Trex deck build
37 degrees on the Colorbond. The image says it all — this is the day I left some skin on the roof.
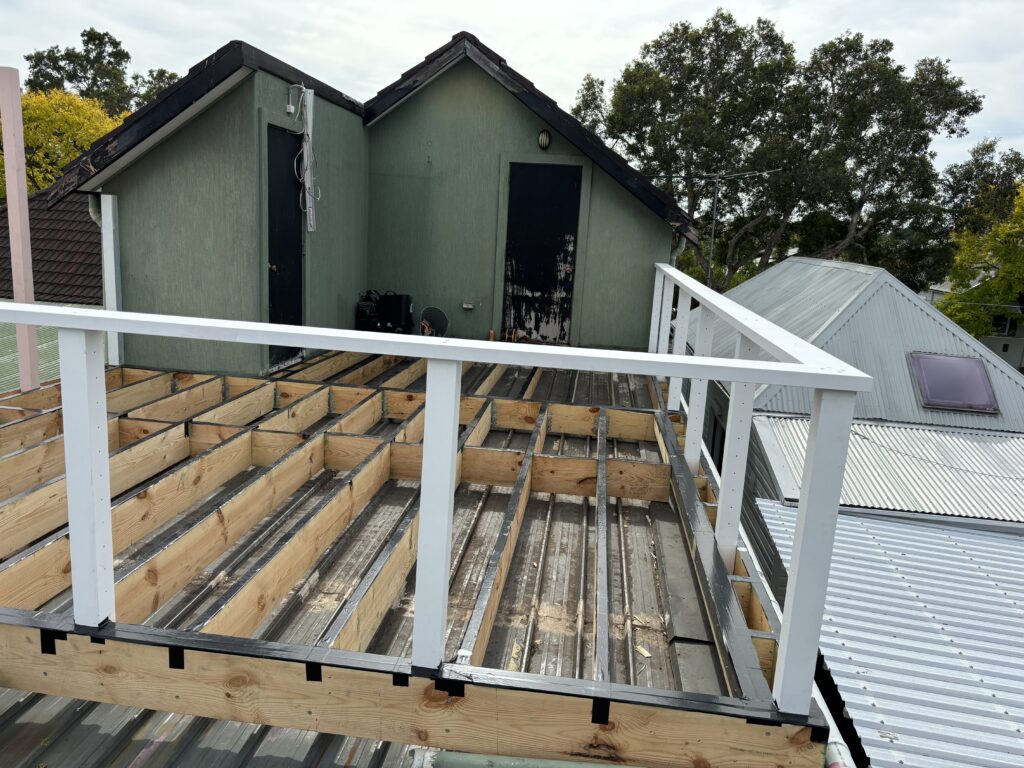
Joist tape and framing protection installed on Mascot rooftop frame
Joist tape across every top edge. Trex outlives the frame underneath if you do not protect the frame.
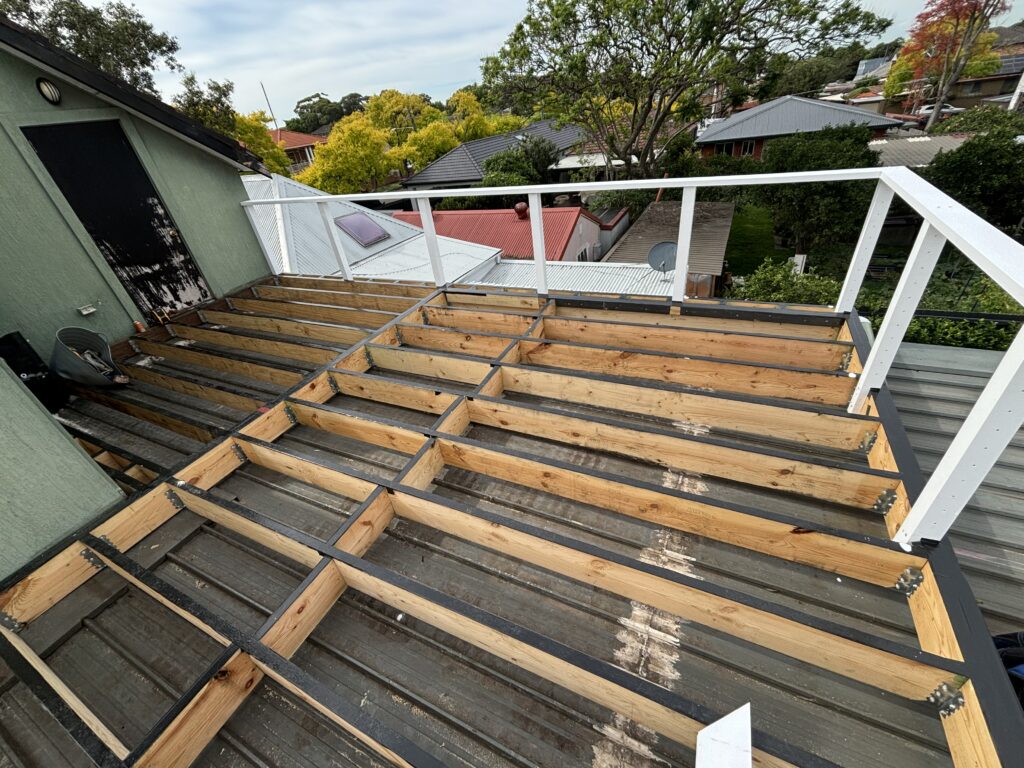
Completed sub-structure ready for Trex decking install, Mascot
Sub-structure signed off. Levels checked corner to corner, perimeter line set, ready for boards.

Stage 4: Trex goes down, screen goes up

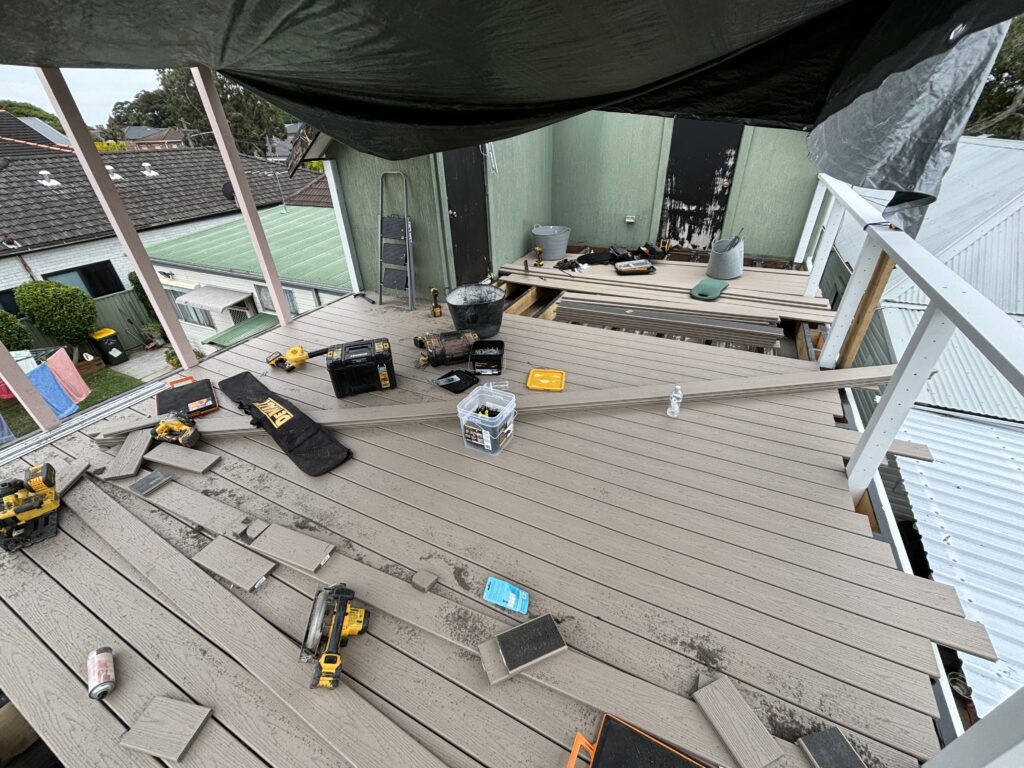
Trex Transcend in Gravel Path. Picture-framed perimeter, hidden fixings, every board checked before the next one went in. Balustrade and privacy screen closed out the same stage.

Trex Transcend composite boards delivered to Mascot rooftop
Got the boards up to the roof — that was its own problem to solve. From here it is the fun part of the build.
Track saw setup for Trex Transcend decking install in Mascot
Lines marked, track saw set up. Trex cuts clean if you do it right; the track keeps every edge true.
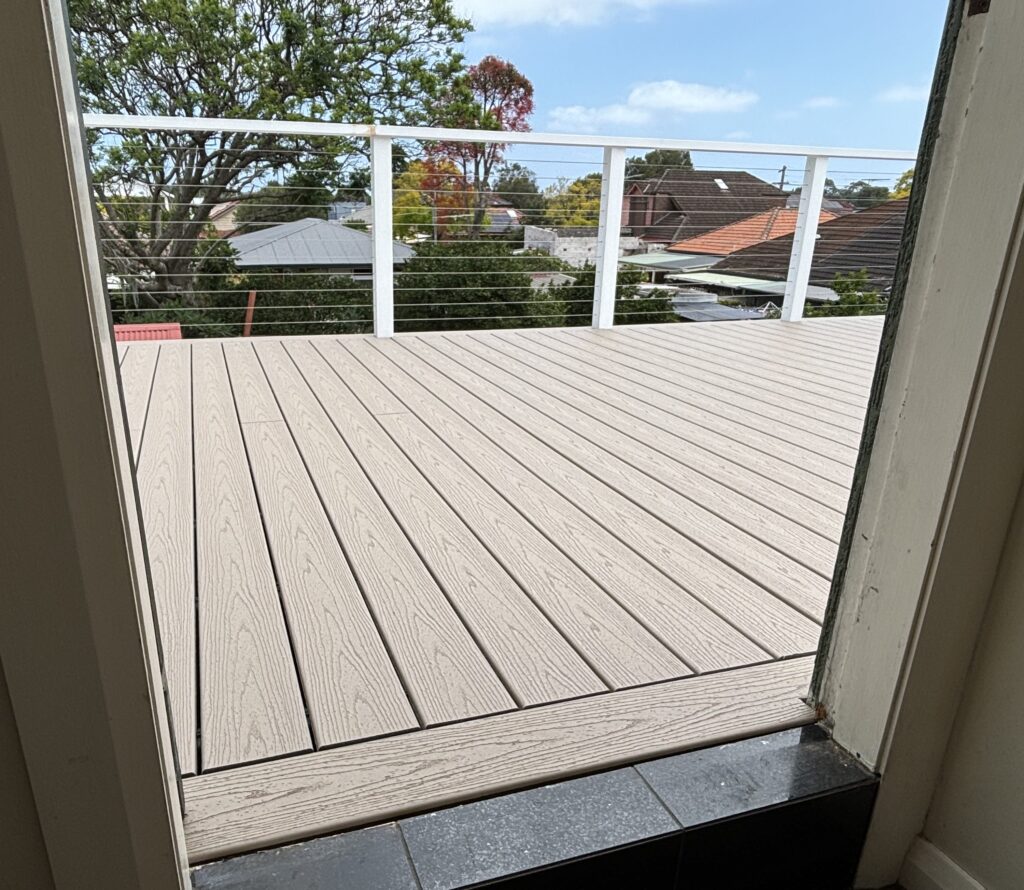
Picture-frame perimeter detail on Trex Transcend deck, Mascot
Picture-frame detail going in around the perimeter. Hides every end-cut, gives the deck a finished edge a tenants wont trip over.
Completed deck balustrade and privacy wall on Mascot rooftop
Deck down, balustrade up, privacy wall in. The neighbour's pool sightline closed off, perimeter compliance sorted.

With the deck, balustrade and privacy screen complete, the build moved upward.

Stage 5: EzGlaze pergola with 7.2m spans

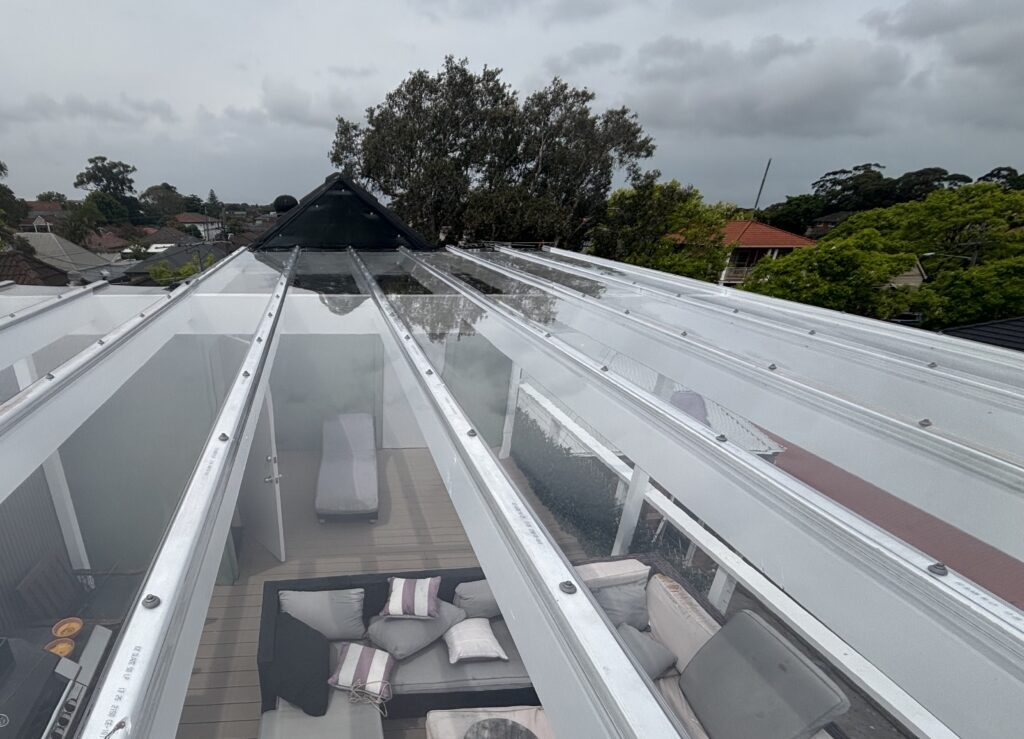
The deck went in first. The pergola came afterwards to give them a weatherproof zone — EzGlaze polycarbonate roof, 7.2-metre clear spans, no joins mid-span.

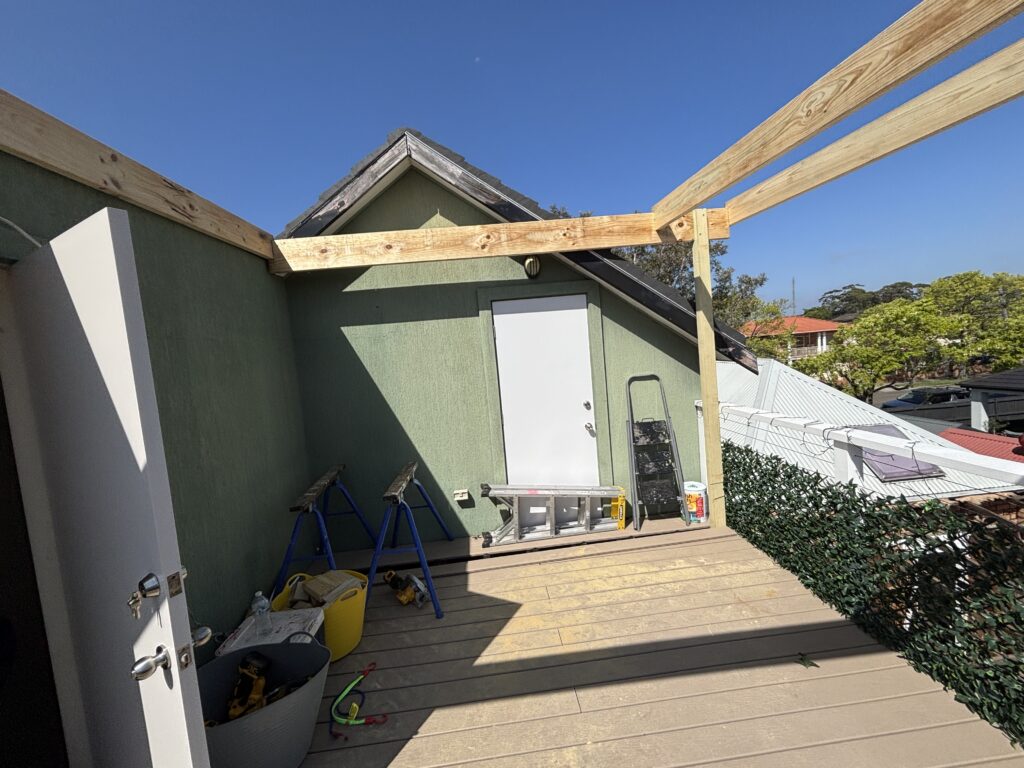
EzGlaze pergola construction begins on Mascot Trex deck
Pergola starts. Posts set, plumbed, tied into the deck frame and the existing structure.
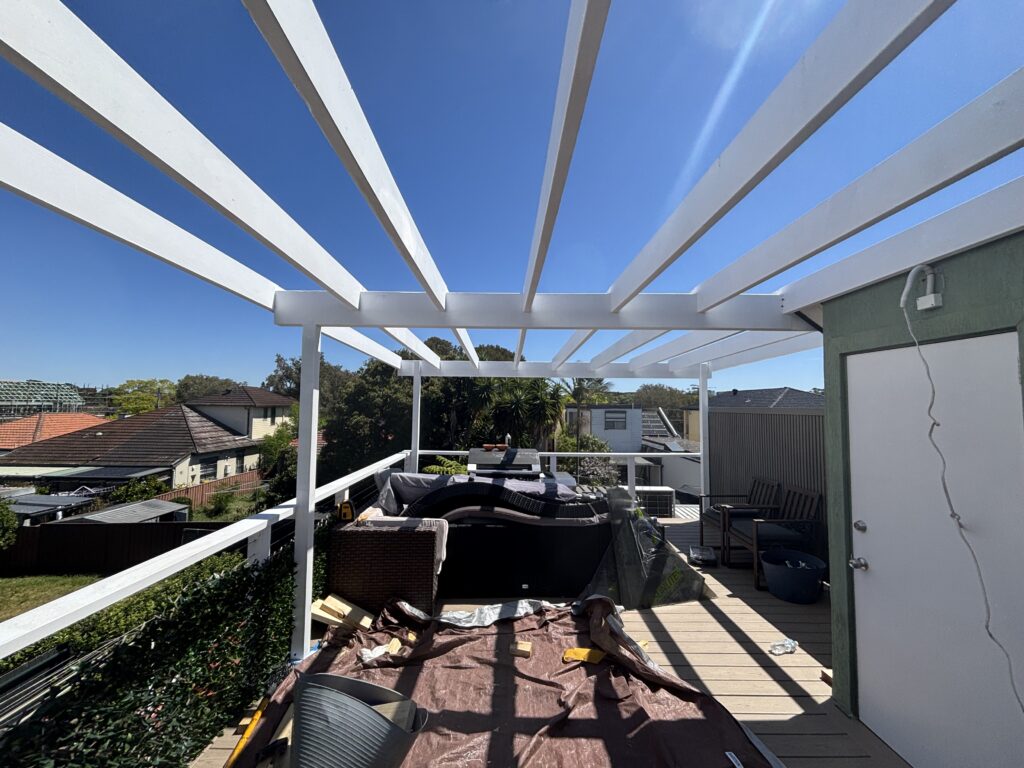
Pergola frame installed and painted ready for polycarbonate sheets, Mascot
Frame complete and painted before the sheets go on. Easier to paint clean than to cut in around polycarbonate later.
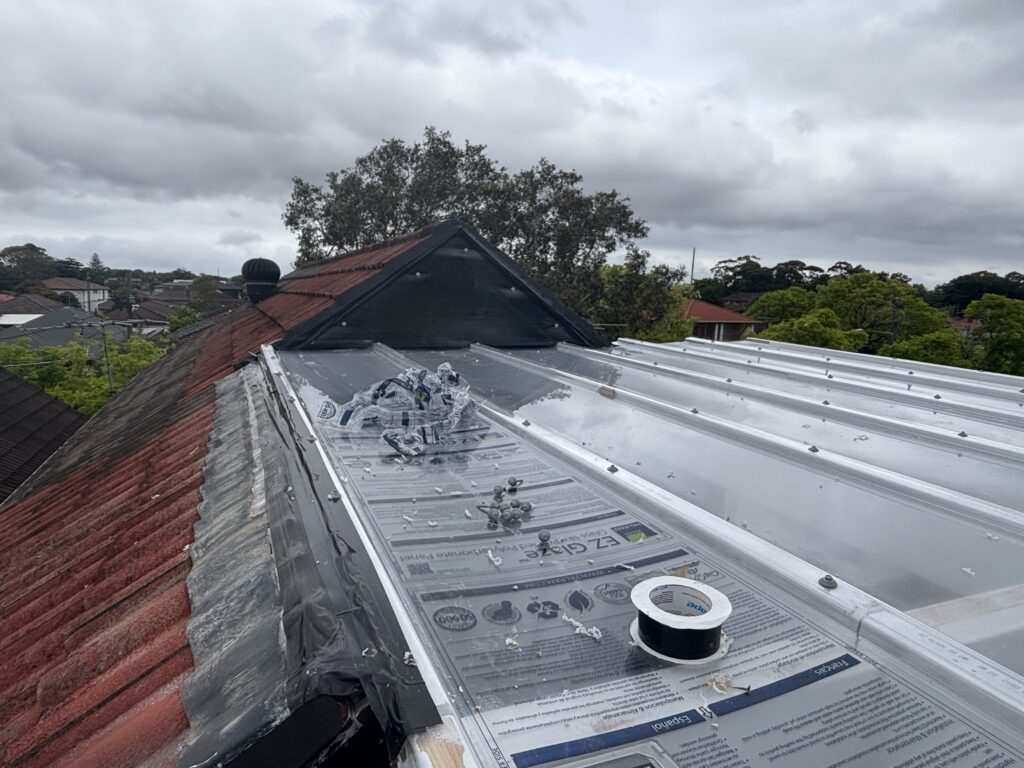
EzGlaze polycarbonate sheets being installed on Mascot pergola
EzGlaze sheets going down. 7.2-metre clear spans, no posts landing in the middle of the deck.
View from completed rooftop deck and pergola, Mascot
Pause for the view. Worth one shot on the page — this is what the tenant gets to look at every morning.
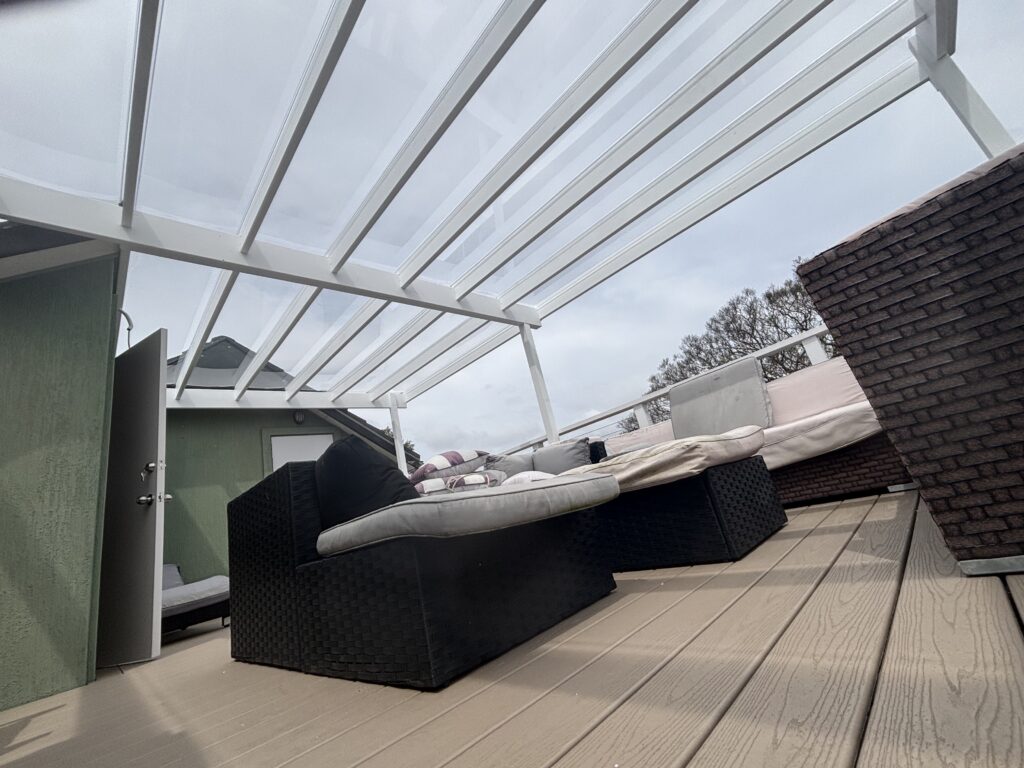
EzGlaze polycarbonate roof detail on Mascot rooftop pergola
EzGlaze polycarbonate. Lets light through like glass, won't crack like glass, no ongoing maintenance.

A rooftop the landlord stops worrying about

The old deck was a maintenance problem and a liability question. What replaced it is a Trex Transcend rooftop, a fall-compliant balustrade, a privacy screen the neighbour appreciates as much as the tenant does, and a pergola that makes the space usable year-round.

For a rental owner, the numbers add up. No annual oiling. No board replacement five years in. No tenant complaint about splinters or movement. The decking carries Trex’s warranty and the rest of the build carries mine.

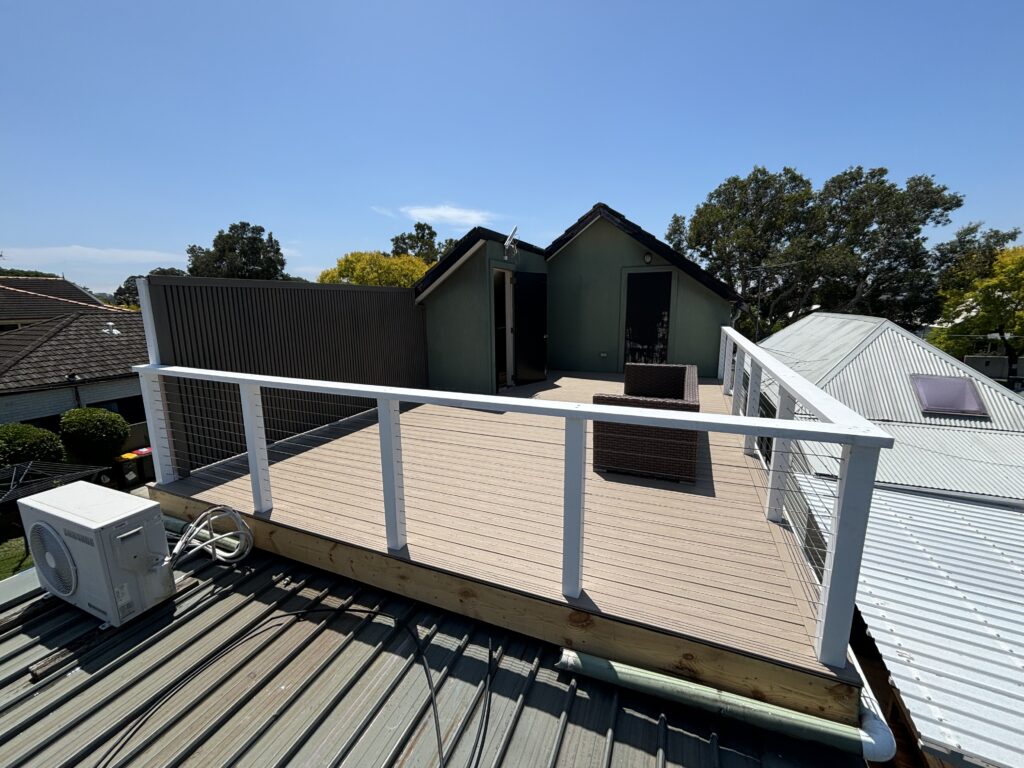
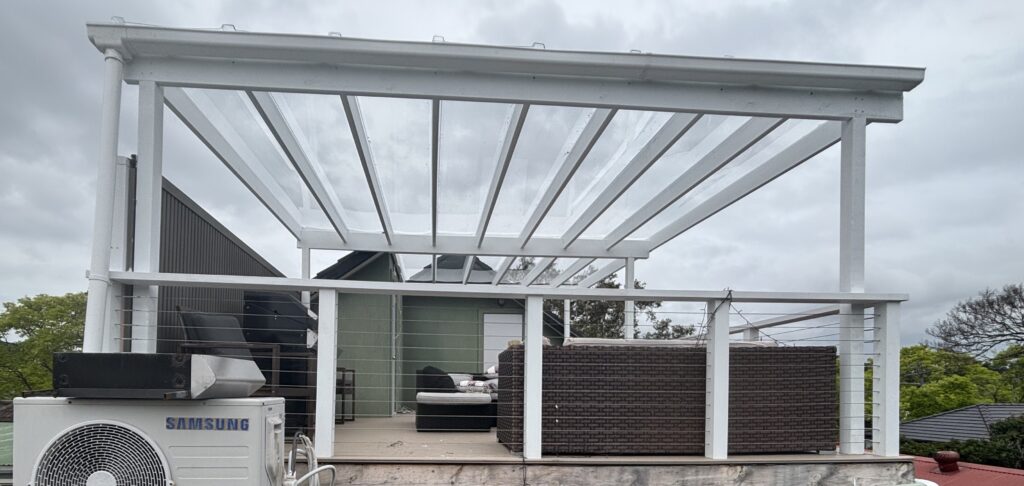
Completed Trex Transcend rooftop deck and EzGlaze pergola, Mascot
The finished space. Trex Transcend below, EzGlaze above, screen wall to one side, balustrade to the other.

Why I specify Trex Transcend on every rental I touch

Trex Transcend is the product I reach for when a deck has to perform without an owner standing over it. It is built for the use case rental decking actually sees — high traffic, varying tenants, deferred reporting on minor damage, and the same “it should just work” expectation landlords carry across every fixture in the property.

The capping is what makes it work. Transcend uses a high-performance three-sided protective shell. That shell resists fading, staining, scratching, and the kind of damage a rental sees in its first twelve months — dropped barbecues, dragged furniture, planters left sitting for two seasons. Timber takes that damage and shows it. Transcend takes it and does not.

The warranty does the talking. Trex Transcend is covered by a manufacturer-backed limited residential fade and stain warranty — Trex currently ranges this coverage from 25 to 50 years depending on product line and purchase date, so I confirm the exact term in writing at quote stage. For a landlord, that converts to a depreciable asset with a predictable service life — not a recurring maintenance line item.

Total cost is lower over the life of the deck. A hardwood deck on a rental needs oiling roughly every eighteen months, board replacements as the years stack up, and a fall-compliance review every time the surface lifts. Trex Transcend removes all three. The upfront cost is higher than a treated-pine-and-merbau build. The 10-year cost is lower, and the 15-year cost is significantly lower.

It suits rooftops in particular. Composite does not move the way timber does in heat, and on a Mascot rooftop hitting 37 degrees in summer that matters. The board profile sits flatter for longer, fixings stay put, and the picture-frame perimeter detail stays tight.

Why landlords and homeowners across Sydney bring me their Trex projects

I am Greg, owner-builder at The Decksmith. Every deck I quote, I design and build myself. Over a decade across the Eastern Suburbs and inner south Sydney including Mascot, Bondi, Bronte, Coogee, Clovelly, Bellevue Hill, Double Bay, and Randwick.

Accredited ByTrex Pro Platinum Partner

Prefer the feel of authentic timber? View my Ironbark or Merbau hardwood projects.

Specialist Trex Decking Builder.

Planning a Trex deck in Mascot or anywhere across Sydney?

If you own a rental, an owner-occupier, or a rooftop that needs to stop costing you money, call me. I will walk the site, talk through the build honestly, and quote what it actually takes — not what the cheapest tender on the street looks like.

Greg — The Decksmith

0468 486 290

Lic. 272840C